Before you begin...
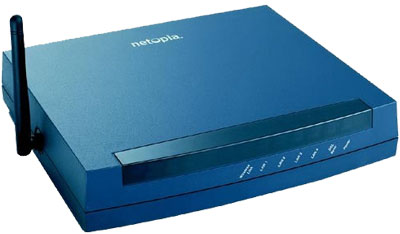
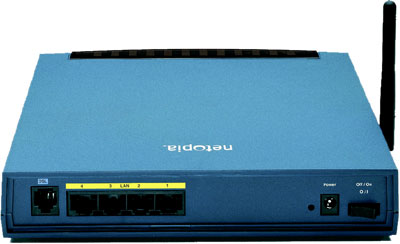
Below is a front and back view of the Netopia 3347. Be certain that the Ethernet cable, phone cable, and power cable are connected properly before continuing setup.
|
Front Panel - Lights
-
Wireless Link: Blinks green when transmitting.
-
LAN 1 - LAN 4: Blinks green when Ethernet is connected.
-
DSL Sync: Solid green when DSL signal is detected, blinks when no signal detected.
-
Power: Solid green when powered on.
|
|
Rear Panel Ports
-
DSL: Plug in an unfiltered phone cord.
-
LAN 1: LAN 4: Plug in an Ethernet cable.
-
Power: Plug in the supplied AC Adaptor.
-
Off/On: Turn DSL modem power off/on.
|
Configuring the Netopia 3347NWG
- Browse to http://192.168.1.254.
- On the left menu, enter Expert Mode, click Configure, then Connection.
- The following settings should be configured:
- VPI: 0 (Users with Embarq/Centurylink phone service should use 8)
- VCI: 35
- Protocol: PPPoE
- Username: Your DSL username
- Password: Your DSL password
- Connection Type: Always on
- Click the Save Changes button. If the connection is successful, a Connection Information page will be displayed. screenshot
- On the left menu, click the Configure button, and then the Wireless button. screenshot
- If your DSL modem has been pre-configured, continue to step 7. If the modem has been reset, do the following before you continue:
- Click the Advanced Configuration Options arrow.
- Next to Privacy: choose WPA - PSK from the menu. screenshot
- Configure your wireless options as needed: screenshot
- Enable Wireless: Turns your modems transmitter on/off
- Wireless ID(SSID): This is the name of your network that will be broadcast to your computer.
- Default Channel: Default is 6. Change if you are having problems with wireless range.
- AutoChannel Settings: Recommended OFF
- Privacy: Keep on WPA - PSK
- Pre Shared Key: This will be the password required for wireless access. It needs to be 8 characters or more.
- Click Save Changes when complete, then close the browser window.
For assistance with setting up your wireless connection, click here.
Advanced Settings
Diagnostics: screenshot
- On the left menu, click Diagnostics.
- The Run Full Diagnostics button will give a full test of your DSL modem connection.
- Three additional tools are provided to troubleshoot your connection:
- Web Address: Use to test modem's ability to contact web addresses.
- NS Lookup: Use to test for DNS issues.
- Trace Route: Use to test for routing issues.
Remote Access: screenshot
- You can enable remote access to allow a TOAST.net technician to access your modem for troubleshooting or configuration. On the left menu, click Remote Access.
- Enter a remote access password if desired, then click the Enable button.
- Note the URL listed on the screen. This is the address you will need to use in a web browser to access the modem.
Article ID: 125, Created: 12/2/2009 at 3:22 PM, Modified: 11/23/2010 at 10:37 AM