Before you begin...
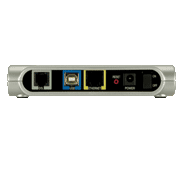
Below is a front and back view of the Netopia 2241. Be certain that the Ethernet cable, phone cable, and power cable are connected properly before continuing setup.

|
Front Panel - Lights
|

|
Rear Panel Ports
-
DSL: Plug in an unfiltered phone cord.
-
USB: Not used.
-
Ethernet: Plug in an Ethernet cable.
-
Power: Plug in the supplied AC Adaptor.
-
Off/On: Turn DSL modem power off/on.
|
Configuring the Netopia 2241
- Browse to http://192.168.1.254.
- On the left menu, enter Expert Mode, click Configure, then Connection.
- The following settings should be configured:
- VPI: 0
- VCI: 35
- Protocol: PPPoE
- Username: Your DSL username
- Password: Your DSL password
- Connection Type: Always on
- UPnP: Checked
- Click the Save Changes button. If the connection is successful, a Connection Information page will be displayed. screenshot
Advanced Settings
Diagnostics: screenshot
- On the left menu, click Diagnostics.
- The Run Full Diagnostics button will give a full test of your DSL modem connection.
- Three additional tools are provided to troubleshoot your connection:
- Web Address: Use to test modem's ability to contact web addresses.
- NS Lookup: Use to test for DNS issues.
- Trace Route: Use to test for routing issues.
Remote Access: screenshot
- You can enable remote access to allow a TOAST.net technician to access your modem for troubleshooting or configuration. On the left menu, click Remote Access.
- Enter a remote access password if desired, then click the Enable button.
- Note the URL listed on the screen. This is the address you will need to use in a web browser to access the modem.
Using With a Router:
If you wish to use your own router, you will want to disable the router built into the Netopia 2241. Click here for information on setting the modem to bridge mode.
Article ID: 221, Created: 11/22/2010 at 5:31 PM, Modified: 1/20/2012 at 10:15 AM