Applies To: Users with a TOAST.net mail account who want to set up IMAP on their Android device
This article will configure your Android phone or tablet to access email only. If you would like to enable contact, calendar, and note synchronization, we recommend G Suite by Google. |
This procedure may vary due to the variety of smartphones running Android:
You will need to know your Server Hostname in order to complete the setup. If you do not know your Server Hostname you can obtain it from the Email Setup Wizard.
Open your phone's Settings
Select Add Account, Accounts, Accounts and Backup, or Accounts & Sync (varies depending on device).
Select Add Account.
Select Email as the account type.

If prompted for the type of email, click Others

Enter your Email Address and Password and tap Next.

After entering your email's login credentials, the system may find the server settings and be ready to use. If not, then follow the instructions below to properly configure your email’s settings.
Select IMAP.
On the screen enter the following information and tap Next.
Incoming server settings:
Email address: your email address
Username: your email address
Password: your password
IMAP Server: (The Server Hostname obtained from the Email Setup Wizard)
Security: SSL (Accept all certificates)
Port: 993

On the screen enter the following information and tap Next.
Outgoing server settings:
SMTP Server: (The Server Hostname obtained from the Email Setup Wizard)
Security Type: TLS (Accept all certificates) or Start TLS (Accept all certificates)
Port: 587
Require Sign-In: checked
Username: your email address
Password: your email password

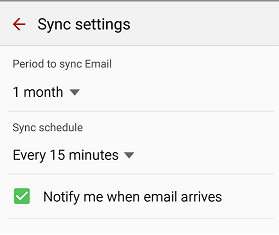
Depending on what phone you have, it may prompt you to customize your preferences for the frequency and amount of data to synchronize. If it does, then follow the recommended settings below. If not, then your email should be ready to use.
You may adjust these settings to your liking, but TOAST.net recommends these sync settings.

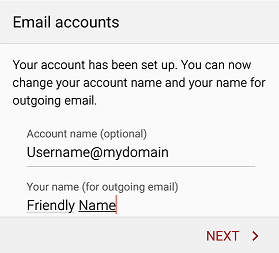
Enter a name for your account (Example: TOAST.net Email) and Your Name (this displays when sending and replying). Select Done when complete.

Email setup is now complete. Depending on your device you may have more options to complete.
Article ID: 649, Created: 2/15/2024 at 4:25 PM, Modified: 1/28/2026 at 9:52 AM